Showing posts with label building. Show all posts

Friday, August 7, 2015

Superuser, Moderation, and Should I Bother

I just noticed tonight that an answer I did on superuser.com has been moderated into oblivion. It had 17 up votes, earning a "Nice Answer" badge, so some people at least felt it was useful.

While I can understand the intention behind the aggressive pruning that occurs, it's just...really disheartening having put some effort into answering as best I could in a precise, useful way, only to have it shitcanned. Especially when to my way of thinking there were a number of things in the answer that would have more longevity than other questions that survive just fine on SU.

So, for posterity, here's my answer. The question was regarding any potential issues with the asker's new PC build, which included common parts like an i5-4570, Gigabyte B85M-D3H, Kingston RAM, GT610, WD Green, and a fairly crappy looking case/PSU combo.

There are a couple of general rules of thumb you should follow when speccing your machine:

  • Don't cheap out on the power supply. I have no idea what is included in that case (specs are not forthcoming), but the price is so much cheaper than many budget cases that come with no power supply, I'm inclined to think that it is very low quality. Unless you are in dire need to save money, look for a separate PSU like a Seasonic. Many Antec or Corsair PSUs are good, as are some Coolermaster or Thermaltake. If you need to get a case/PSU combo due to budget, look for something like the Thermaltake Versa series.

  • Current onboard graphics (which is built into the CPU and accessed via the ports on the motherboard) is better than a low-end GPU like the GT610. Age of Empires doesn't need much graphics power, so I think you'll be fine with onboard graphics. The disclaimer is perhaps you want a cheap GPU for experimentation purposes, targeting your software to particular graphics card or something.

  • The CPU and the GPU are the two biggest parts that determine what kind of power supply you need. The system as specced above will use <150W even at maximum load. A good quality 350-450W PSU is where you should be looking, unless you want to support upgrade to a high-end gaming graphics card in the future — if so, look for 500-600W.

  • The motherboard you have chosen can only run RAM at 1600MHz, so the 1866MHz will clock back to that anyway. You could get a 1600MHz with CL9 timings (lower the better for timings), only a very minor difference in performance though.

  • Most modern consumer CPU/motherboard use dual channel RAM, you will get a mild performance boost by getting 2x4GB of RAM.

  • Get an SSD if you can and install the OS/applications on it. Use the HDD for storage. SSDs are awesome, particularly if you do dual-boot, as they reduce boot times and application load times significantly.

  • If you can't get an SSD due to budget, don't use a 5400RPM hard drive like the Caviar Green as your boot drive, they are very slow. A WD Caviar Blue (for example) is a better option.

  • Consider a Virtual Machine for doing the Linux development if dual-booting gets annoying. Unfortunately VMs are bad for games, so you can't really do it the other way around. Alternatively, you could consider running the games under wine in Linux. AoE III for example appears to have pretty reasonable support. Dual-booting is pretty annoying in my experience if other options are available.

Edit:

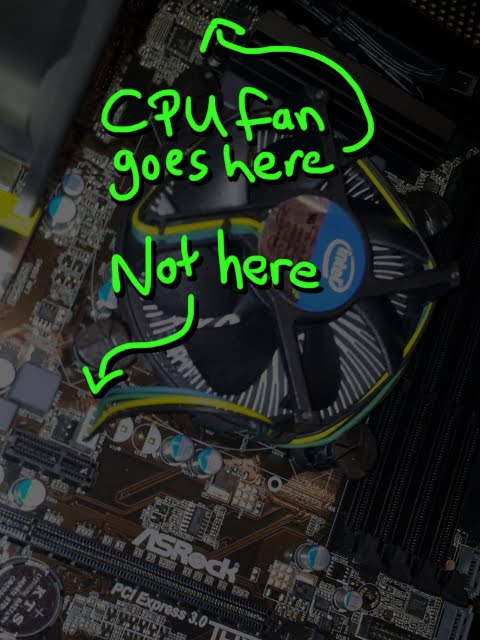
  • Since it's your first time putting one together too, I'd suggest watching a few videos on how to do it (search youtube for "how to build a computer" or similar). Will give you a feel for how everything fits together.

The whole thing is still available in the google cache in case anyone is particularly interested.

Saturday, November 22, 2014

Build Log Followup: Another Gigabyte G1 Gaming

Continuing on from last week's post, while I wanted to track down an MSI GTX970 to try it out, local suppliers were completely out of stock of that card. And then MSY had a 10% off Gigabyte products sale, so...long story short I got a Gigabyte GTX970 G1 Gaming.

The GTX970 G1 Gaming

Couple of points of note for anyone thinking of getting one:

  • The specs say the length is 312mm, but I think this includes both the frame and perhaps a little leeway. I measured 298mm from the inside of the frame to the end, so it might fit in cases where the specs say it shouldn't. Viewer discretion advised.
  • Requires 1x8-pin and 1x6-pin power connectors.
  • I've run it with the Power-Mate Lite for over a week — on the i7-4790K (stock) system the maximum power draw was 316W while gaming.

On the Windows side there were no issues of note compared to the last one I installed, but on Linux it was a different story.

I had a Kubuntu 14.04 install on the same machine with Windows 8.1, which was working perfectly with Intel graphics. After plugging in the GTX970, the Linux install refused to boot. Using "text" or "text nomodeset" override options in grub showed it was hanging at random places during the boot process. Even a live distro off USB failed to get a display. While running off onboard I installed the nvidia-current drivers, which didn't help.

The solution turned out to be installing the latest xorg-edger drivers. The process is described in this forum post by Kade7596, but the brief summary is:

sudo add-apt-repository ppa:xorg-edgers/ppa
sudo apt-get update
sudo apt-get install nvidia-346

Normally I would run "nvidia-xconfig" after installing the drivers, but the 346 drivers don't seem to include this application any more. Since I'd already run it using the older drivers from the Ubuntu nvidia-current target, I had a default xorg.conf written. Not sure if it was necessary.

After installing nvidia-346 the GTX970 now works.

In closing, the G1 Gaming also glows in the dark...

Saturday, November 15, 2014

Build Log: Intel i7-4790K + Gigabyte Z97X-UD5H

Put together a new rig to form a core gaming and test machine.

CPU: Intel i7 4790K Motherboard: Gigabyte Z97X-UD5H RAM: G-Skill Ripjaws 2x8GB 2133MHz SSD: Plextor M5-Pro 256GB (already owned) HDD: Old one ODD: Old one Case: Fractal Design Arc XL PSU: EVGA SuperNova G2 750W

Fractal Design Arc XL

First up is the impression of the case, the Fractal Arc XL, big-brother to the Arc Midi I used last month.

It's a big spacious case, looking very similar to the Midi. The top panel has a couple of extra USB ports.

Also comes with a bucket load of screws and a few cable ties. A few notes on the XL from during and after the build:

  • Just like the Midi, the XL is great to build in. Spacious, good quality all round.
  • The feet on the case come with stoppers that don't slide very well. My machines sit under a desk, and when sliding it in place one of the stoppers came off.
  • The built-in fan controller requires a 4-pin molex power connector. I had to connect a dedicated cable to the PSU purely for the fan controller.
  • The HDD caused the front panel to buzz/vibrate. I had used the rubber anti-vibration rings to install the HDD, but had them done too tight. After loosening them off, the noise went away.
  • The PSU is mounted on rubber stands &emdash; haven't seen that before.
EVGA SuperNova G2 750W

Made by OEM SuperFlower, I got this guy on the back of some really strong reviews at JonnyGuru and TechPowerup.

SuperNova G2 in box, loads of cables

Comes with a lot of cables and velcro cable ties. The modular cabling is nice, but as above with the fan controller, sometimes you need to use "just one more" for that extra little thing you need to connect.

Out of box

Mounting it was painless. As noted above the XL has rubber mounts for the PSU to sit up on.

I can only assume this is for a little extra airflow to the PSU fan.

SuperNova G2 mounted. Mind the gap

Gigabyte Z97X-UD5H

I kinda knew that while this was a solid board, it had a potential issue at stock speeds with an unlocked chip like the 4790K. Thought I'd give it a go anyway.

Gigabyte Z97X-UD5H

It's a nice looking board with lots of features. Only thing of note really is that it was somewhat thinner than I expected. It felt no different to other cheaper boards like the H97 line, whereas I've heard it claimed in the past that the PCB on expensive Z boards is thicker. Didn't seem to be the case, but then I didn't pull out any of my older (cheap) boards to do a direct comparison. The board is plenty strong enough though.

Update 21/11/2014:Should note there is an issue with the UD5H and the 4790K at stock settings — details at this thread.

Initial Build/Setup

Putting it together, it was a nice case to use with plenty of cable routing options. Finished product looks fairly neat even without tying any of the cables down.

Obviously there are two big omissions from this initial setup:

  • It's using the stock cooler. I've got an aftermarket cooler to put on, but my plan was to test out the stock cooler with the 4790K and UD5H. Will document later.
  • There's no GPU. That's still to come. I was trying to track down an MSI GTX970, but they're pretty difficult to come by. Instead will probably get my hands on the Gigabyte G1 Gaming. :)

Monday, October 6, 2014

Build Log: Fractal Midi R2, i5 4590+H97

Putting together a new machine for a friend. This is its story...

First up, the list of parts used:

CPU: Intel i5 4590 CPU cooler: Coolermaster Hyper 212 Evo Motherboard: Gigabyte H97-D3H RAM: G-Skill Ares 2x4GB 1600MHz SSD: Plextor M5S 256GB HDD: Seagate 2TB 7200RPM ODD: Lite-on DVD-RW Case: Fractal Design Arc Midi R2 PSU: Antec True Power Classic 550W

The usual suspects

Initial reaction to the Fractal Define Arc Midi R2 is that for a mid-sized case, it's...big. At least, it's very wide. Good for big CPU coolers if needed (180mm of clearance).

The Fractal Design Arc Midi R2

The case has some nice features, including an in-built fan controller for up to three fans. The switch for fan speed levels is built into the front of the case. Switching between the speeds after completing the machine, at 12V the fans audible but not too noisy, while down at 5V they're barely audible at all.

Arc Midi R2 front panel connectors, including fan controller switch

The R2 comes with a bunch of screws, cable ties and risers as you would expect. Below is the inside of the case with both side panels removed. If there was a blemish with this case, it was that one of the side panel screws felt slightly cross-threaded when first undone. Very minor in the scheme of things, hardly worth even saying, but I liked everything else about the case :)

On to the rest of the components. CPU is the i5-4590, motherboard is the Gigabyte H97-D3H. Both solid mid-range options for a non-OC machine.

The Gigabyte H97-D3H

I've heard people say that when installing an Intel CPU for the first time, they get a bit scared by the sounds that the lever used to hold the CPU in place can make. It can make creaking sounds, but this is normal in my experience. It is applying a fair bit of force, since it needs to keep the CPU absolutely stationary in its socket.

The i5-4590 in place in the motherboard

Next I installed the RAM and cooler. I did this outside of the case, but that turned out to make accessing the top left of the motherboard awkward when screwing it in place (fat fingers!). Putting the motherboard in first and then mounting the cooler (there is a cutaway behind the motherboard that lets you do this) would have been easier. And while this is a non-overclocking machine — and so the stock cooler would have sufficed — for a little extra quietness I got the aftermarket cooler.

Motherboard with RAM and cooler installed

Adding the other components to the case was fairly straightforward. The drive bays all have rubber sound-reducing grommets to screw hard drives into, and mount points for SSDs. Cable management was an absolute breeze in this. I think I only used two of the cable ties that came in the box, the rest more or less managed itself. I'm far from great at cable management, but this case made it really easy.

The finished product...almost

The picture above is the complete machine, minus the graphics card, which I'm waiting on for stock. Intending on a GTX970, hopefully an MSI model so it will fit without needing to remove the top HDD cage. The loose cable at the bottom of the case is the PCIe power connector for the GPU. I'll post an update when the GPU is in. Currently the machine gets about 10FPS on the Unigine Heaven benchmark the poor dear. I'm sure a GPU will help out a little there.

Update: Addendum for the GPU installation.

Tuesday, November 5, 2013

Review: Shaw GT-GM1 Computer Case

After reading this review on OCAU forums, I was curious as to whether the Shaw cases were really a viable option for budget builds.

So I picked up the $33 Shaw GT-GM1 from MSY to give it a test (no PSU of course -- as all good children say in their prayers at night, please don't let Daddy use a Shaw power supply).

I must admit the sound of parts rattling around inside the box was a bad sign. Turned out to be a couple of 5.25" and 3.5" clips that hold drives in place had fallen out and needed to be clipped back together -- no big deal.

First impressions: the case appearance was far from pretty, but not too garish. The crinkly front doesn't look as bad in real life as it does to me in the photos. Top-mounted power supply position is getting rarer these days, but was common a few years back and seems the way ultra-cheap cases are still made. The back screws felt a little cross-threaded. The side panels were flimsy (as noted in the other review), pretty much as expected in a cheap case.

Notes on the rest of the setup:

  • One of the 3.5" plastic disk holder clips was missing.
  • Two missing expansion slot plates at the back.
  • Motherboard risers were pre-installed. Some risers were loose and couldn't be tightened -- cross-threaded out of the box. Reworking some of the other risers (there were more than would be needed for the mATX board I had) fixed the problem, but it didn't instill any confidence.
  • No case screws! Other than the motherboard risers, nothing at all.
  • Front panel cords were cable-tied in such a way they wouldn't reach the motherboard. Pretty difficult to cable-manage them in any neat way.
  • Case comes with a single fan at the back. The fan had to be powered directly from the PSU via a Molex plug, rather than a 3- or 4-pin plug into a motherboard header.
  • Noise levels aren't great. The case fan runs flat out due to its Molex plug.

I can't remember ever feeling so dubious about a case working properly, but on first boot everything seemed okay. USB, headphones, power/reset switches and fan all worked upon testing, frankly to my surprise at that point.

So my conclusion is a little different to the OCAU reviewer's: given the problems I found with this case, I couldn't recommend it, even taking into account the price. It not unlikely that someone looking to do a cheap-as-possible build may be doing their first or at least be inexperienced. The lack of case screws and dodgy motherboard risers would likely stymie them. I was okay because I had a heap of spare parts, but that isn't everybody. Anyone actually using the case should be prepared to either replace the stock fan or fit a voltage regulator (taking the price closer to the next-case-in-line anyway).

In my opinion, you're far better off paying an extra $15 for a fifty-dollar case. Even though they may not be fantastic either, I think it's money well-spent.

Tuesday, September 10, 2013

Budget Small(ish) Web Browser Box

I wanted a small box to sit in the corner as basically nothing more than a web browser. Since mITX parts were so difficult to source locally, I went the smallest mATX case I could find.

Here is the parts list:
  • CPU: AMD A4-5300 $55
  • Mobo: Asus F2A55M-LK-Plus $49
  • RAM: 1x4GB 1600 (already had)
  • SSD: Plextor M5S 128GB $89
  • Case: Coolermaster RC361 $49
  • PSU: Corsair VS450 $49
  • KB/Mouse: USB combo (already had)

Total: $291 (would have been about $350 if I didn't have RAM/KB/mouse already).

Some happy snaps:

The motherboard, fresh out of the box. Notice how it captures the light...(because of my crappy photography)

The motherboard was fairly low end, but was a good price so I grabbed it. It doesn't have a USB 3 header of SATA 3, but since the build didn't need either, it filled the requirements.

CPU, pins pins pins

Motherboard with RAM, CPU and HSF mounted

Mounting the AMD HSF was straightforward: stick it on the CPU and clip it into place. Easier than Intel's "four pins" mechanism, which takes a little getting used to.

The empty case

The Coolermaster RC361 is about the smallest micro-ATX case I could source locally. It's a "sideways" mini tower, so can stand upright or on its side. For a case that cost less than $50, it's not too bad.

Case with the power supply (tucked away, unusually, in the front of the case)

Mounting the power supply was fairly tricky, and given its unusual location, there's no way to turn the PSU on or off without pulling the front of the case off (which, unlike some cases, came off easily). I don't think access to the PSU switch will prove too much of a problem for my uses. The case also has no place to mount an SSD. Since I didn't have a mounting kit, I just taped it to the bottom of the case. The RC361 does come with a comprehensive set of extra screws and cable ties.

The completed build. SSD isn't visible because it's taped to the bottom of the case

Installed Kubuntu 13.04, it worked really well. The AMD A4-5300 (with proprietary Catalyst drivers installed) will even play some games at a reasonable level (if with low settings).

Wednesday, January 16, 2013

Building i5-3470: Summary

The following is a summary post for my i5-3470 build. Unfortunately a lot of the photos didn't turn out all that well, which will teach me for using my phone instead of a real camera. Oh well.

Part 1: Build Overview

Over Christmas 2012 I gathered together parts to build a new computer.

Group shot!

Machine requirements: general purpose day-to-day workhorse. Needs to be able to do most tasks from email/internet, document/artwork creation, software development, light gaming, virtual machines and (possibly) animation rendering. The last two are not going to be often, but it'll need to handle them.

Chosen parts (desktop box):

  • Case: Corsair 300R
  • PSU: Antec Neo Eco 520C
  • Motherboard: ASRock H77 Pro4/MVP
  • CPU: Intel i5 3470
  • RAM: G-Skill Ares 2x4GB
  • SSD: Samsung 830 128GB
  • HDD: Seagate Barracuda 2TB
  • ODD: Samsung 22x DVD R/W
  • OS: LinuxMint 14 (Cinnamon) [since ditched in favour of Xubuntu 12.10]

The Corsair 300R

Accessories (some added post-build):

  • Monitor: Dell U2412M (24" IPS)
  • Keyboard: Ducky DK9008 Shine II (Cherry Browns)
  • Mouse: Logitech G400

(Yes, I splashed out on an expensive keyboard. Don't you judge me!)

Part 2: Case and Power Supply

After unboxing the case and the power supply, I had a couple of minor conerns:

  • The case had a blemish on the inside about where the motherboard would sit (see image). While it might have been an indication that the case was a return and not brand new, everything else seemed fine and I'm not really sure what difference a "returned" case would make. Also, this could have just been a manufacturing thing anyway.

    Corsair 300R with minor blemish on interior

    This pic also shows up the "bump risers" in the 300R, which comes up later.
  • The box the PSU came in was a little bit beat up, but there was nothing on the inside that made me think it was anything but new.

    The Antec Neo Eco 520C

The first step is to mount the PSU in the case and screw it in. This immediately led to the question: PSU fan up or fan down? A quick web search suggested that down may be slightly better (potentially lower temps on the system, but also someone pointed out you're less likely to drop small items like screws into the fan).

The 300R has a bottom vent, so I decided to go with "fan down".

Case with PSU installed

Next potential concern: there was no voltage selector on the Neo Eco 520C. Other (cheaper) power supplies I've used have had selectors. The lack of one suggested that the Antec could handle either 115V or 240V, and reading the labelling confirmed this. So there was no need to "select" an option.

It's also worth noting that the Antec Neo Eco 520C (and I guess all Neo Ecos?) doesn't come with a power cable. For me this wasn't a problem since I had half a dozen laying around, but might be a problem for some people.

Part 3: Motherboard Installation

Some people like to install the CPU/heatsink/RAM before putting the motherboard into the case. I just whacked the motherboard in there right up front, mainly because I didn't have a place where I felt comfortable putting it to then push and prod other parts into it.

The first issue I had with the motherboard was: where are the motherboard risers? The Corsair 300R only came with one motherboard riser in the pack of screws. This confused me, since in the past the cases I'd used needed at least half a dozen risers to prop the motherboard up so it wouldn't touch the case and short out.

It turns out that the 300R has "bump" style risers, where you don't actually need to screw in anything. Convenient...once you know about it.

Motherboard with CPU installed

After that, the CPU went in without an issue. It can only go in one way, you just have to line up the bumps and indentations. The heatsink/fan was a different story.

I've done it a couple of times now, so I seem to have a knack for seating the heatsink in such a way that the power cord for the CPU fan won't reach the spot on the motherboard where it plugs in. This time I misread the "CHA1 fan" as "CPU fan", and seated the heatsink accordingly. After realising my mistake, I pulled it off and rotated 90 degrees so it would plug into the correct spot. (Technically, since I pulled the heatsink off after being seated on the CPU, I should have redone the thermal paste, but since the machine hadn't ever been powered up, I felt it wasn't that much of a risk. But I noted it to check the temps first thing after powering on).

CPU fan plugged into wrong spot

The only interesting thing with the RAM is that the ASRock motherboard doesn't colour-code the slots like, say, a Gigabyte motherboard. But to use dual-channel, the RAM goes in the same way (that is, leave a gap between the RAM sticks to run in dual-channel).

Motherboard with RAM installed

Part 4: Plugs, Cables and Initial Bootup

Next was to plug in all the drives (DVD, HDD, SSD), case fans and the front-of-case switches, LEDs and USB cables.

Corsair 300R cable management (back view)

The cabling with the 300R turned out fairly nice, with the USB3 and leftover molex/PCI power cables being the most obtrusive. It really helps having someone else around to hold and adjust cables from one side while you're trying to tie them (thanks Dad).

Corsair 300R cable management (front view)

That brings us to the moment of truth: the first power on.

I flicked the switch and passed the first test: it didn't explode. However, the power cables for the CPU fan were wound so tightly around the heatsink that they caught on the fan and prevented it from spinning. This has happened almost every time I've installed an Intel stock fan, so from now on I check this before turning on.

After noticing the fan not spinning, I shut down straight away. Even though the CPU should protect itself from overheating and kill the power, it's not something you want to risk if you don't have to. I rearranged the wires of the CPU fan and everything went okay on the next powerup.

I'd forgotten that I had a Bodhilinux distro installed on the SSD from when I tested it out in a previous machine. When I turned it on (in this completely new build), it ran up without a glitch.

Initial impression of the sound is that the stock CPU fan is a little louder than the i3 3220. May have just been imagination, or something to do with re-seating it, but it's still a bit louder than what I was expecting/hoping for.

Build complete

Overall, pretty happy with the build. Next step is installing (and experimenting) with a GPU while running Linux.