Wednesday, November 23, 2016

Fix "Cinnamon Just Crashed" on Linux Mint 17.3

A recent update in Linux Mint included the nVidia 367 driver. Even though my HTPC was using integrated graphics, having the driver installed causes Cinnamon to crash with the error message:

Cinnamon just crashed. You are running in fallback mode.

A fix is to remove the nVidia 367 driver completely:

sudo apt-get purge nvidia-367

Reboot and Cinnamon should be running okay again.

Saturday, September 17, 2016

Image Stacking in reveal.js

A while back I posted on image overlays in reveal.js. That technique seemed promising but has a problem in practice as it messed with the scaling at different resolutions.

A technique that I ended up using was to split an image section off to one side rather than overlay it on top of the text, with a link to the image original so that you could fullscreen it if desired. Multiple images can be stacked on top of one another by offsetting to top left coords.

Here's a snippet of the code:

<section id="slide-1">

  <h2>Slide Heading</h2>

  <div class="image-float">
    <p style="position: relative; left: 0; top: 0;">
        <a href="image1.jpg"><img src="image1.jpg" height="700vh"/></a></p>
    <p class="fragment" data-fragment-index="2" style="position:absolute; left:20px; top:20px;">
        <a href="image2.jpg"><img src="image2.jpg" height="700vh"/></a></p>
    <p class="fragment" data-fragment-index="4" style="position:absolute; left:40px; top:40px;">
        <a href="image3.jpg"><img src="image3.jpg" height="700vh"/></a></p>
  </div>

  <div class="content-aside">
    <p class="fragment fade-down" data-fragment-index="1">Text 1</p>
    <p class="fragment" data-fragment-index="1">Text 2</p>
    <p class="fragment" data-fragment-index="3">Text 3 (after image 2)</p>
    <p class="fragment" data-fragment-index="5">Text 4 (after image 3)</p>
  </div>
</section>

And the css for the custom classes:

.image-float {
   float: left;
   position: relative;
   top: 0;
   left: 0;
}

.reveal .content-aside {
   margin-top: 1em;
}

This technique was okay, but still not perfect, as the stacked images to offset on the left side but scaled so the right hand side sat flush on each one...something for another day.

Saturday, August 13, 2016

Things to Look for in a New TV, Beyond the Usual Ones

At some point I'll have to upgrade my TV. My current one is "non-smart", and works fine but is getting old. Since you can't practically get a dump TV any more, I'll have to accept that will come with the package.

Other than the usual specs like screen size, resolution, refresh rate, colour reproduction, there are a few things I want to look at when buying any new TV:

  • Turn on time from cold start. The time it takes some TVs to turn on these days is really annoying.
  • Channel change time. Likewise, changing channels for some reason can take a ridiculous length of time.
  • Input lag. Good to know in case the TV is ever used for gaming.
  • What firmware is the "smart" bit based on? Is it an open source or community supported firmware, so that when the manufacturer gets bored of supporting that model you can still get updates? If I don't want to agree to the T&Cs of an update, will it stop playing any specific media formats? Can I be held hostage to the manufacturer in order to play content?
  • 4K refresh rate. Does the 4K refresh rate match the advertised rate, or it that a sneaky "only at lower resolutions" thing?
  • HDCP. Given I run my own HTPC, this is a really important one. Will the TV's HDCP implementation work via the HDMI connection on a laptop? Will it work with a desktop GPU connection? I'll take a laptop when looking at TVs to test this.

Thursday, August 11, 2016

Internode Ping Spikes While Playing CS:GO

This is a typical ping log just now while playing CS:GO. I'm using ADSL2 and relatively close to the exchange (<500m). I've used an Asus RT-AC68U and a TP-Link Archer D9 and I get similar responsiveness with both:

64 bytes from pubweb.internode.on.net (150.101.140.197): icmp_seq=242 ttl=59 time=1119 ms
64 bytes from pubweb.internode.on.net (150.101.140.197): icmp_seq=243 ttl=59 time=1233 ms
64 bytes from pubweb.internode.on.net (150.101.140.197): icmp_seq=244 ttl=59 time=1249 ms
64 bytes from pubweb.internode.on.net (150.101.140.197): icmp_seq=245 ttl=59 time=644 ms
64 bytes from pubweb.internode.on.net (150.101.140.197): icmp_seq=246 ttl=59 time=91.9 ms
64 bytes from pubweb.internode.on.net (150.101.140.197): icmp_seq=247 ttl=59 time=712 ms
64 bytes from pubweb.internode.on.net (150.101.140.197): icmp_seq=248 ttl=59 time=1076 ms
64 bytes from pubweb.internode.on.net (150.101.140.197): icmp_seq=249 ttl=59 time=1222 ms
64 bytes from pubweb.internode.on.net (150.101.140.197): icmp_seq=250 ttl=59 time=1254 ms
64 bytes from pubweb.internode.on.net (150.101.140.197): icmp_seq=251 ttl=59 time=1291 ms
64 bytes from pubweb.internode.on.net (150.101.140.197): icmp_seq=252 ttl=59 time=1304 ms
64 bytes from pubweb.internode.on.net (150.101.140.197): icmp_seq=253 ttl=59 time=1274 ms
64 bytes from pubweb.internode.on.net (150.101.140.197): icmp_seq=254 ttl=59 time=520 ms
64 bytes from pubweb.internode.on.net (150.101.140.197): icmp_seq=255 ttl=59 time=24.4 ms
64 bytes from pubweb.internode.on.net (150.101.140.197): icmp_seq=256 ttl=59 time=24.2 ms
64 bytes from pubweb.internode.on.net (150.101.140.197): icmp_seq=257 ttl=59 time=25.2 ms
64 bytes from pubweb.internode.on.net (150.101.140.197): icmp_seq=258 ttl=59 time=114 ms
64 bytes from pubweb.internode.on.net (150.101.140.197): icmp_seq=259 ttl=59 time=451 ms
64 bytes from pubweb.internode.on.net (150.101.140.197): icmp_seq=260 ttl=59 time=898 ms
64 bytes from pubweb.internode.on.net (150.101.140.197): icmp_seq=261 ttl=59 time=1234 ms
64 bytes from pubweb.internode.on.net (150.101.140.197): icmp_seq=262 ttl=59 time=1296 ms
64 bytes from pubweb.internode.on.net (150.101.140.197): icmp_seq=263 ttl=59 time=1272 ms
64 bytes from pubweb.internode.on.net (150.101.140.197): icmp_seq=264 ttl=59 time=1285 ms
64 bytes from pubweb.internode.on.net (150.101.140.197): icmp_seq=265 ttl=59 time=1281 ms
64 bytes from pubweb.internode.on.net (150.101.140.197): icmp_seq=266 ttl=59 time=1437 ms
64 bytes from pubweb.internode.on.net (150.101.140.197): icmp_seq=267 ttl=59 time=1481 ms
64 bytes from pubweb.internode.on.net (150.101.140.197): icmp_seq=268 ttl=59 time=1235 ms
64 bytes from pubweb.internode.on.net (150.101.140.197): icmp_seq=269 ttl=59 time=564 ms

All I can say is...gg.

Sunday, July 24, 2016

PSU Status Summary

Following along from the SSD summary, the powers supplies I've used myself or for family/friends over the past few years:

My PSUs:

Make/ModelPurchasedPurposeIssues
Powerman IP-P410Q3-2
410W
2008 (approx)General use/Gaming PCPower warnings when logging into Linux on the machine; unsure if it's the PSU or not, but it's getting a bit old. No obvious issues with it though.
Antec Neo Eco 520Dec 2012General use/gaming PC
Antec EarthWatts 380Mar 2013HTPCMachine occasionally "turns itself off" for no apparent reason, could be the PSU <- cleared of fault by the TPC-450 below
Corsair VS450Aug 2013General use
Corsair VS3502014General use
Antec EarthWatts 3802014 (2nd hand)General use
EVGA SuperNova G2 750W2014Gaming PC
Antec TPC 450 GoldJul 2016HTPC
Corsair CX550MJul 2016General use/gaming PC

Other PSUs:

Make/ModelPurchasedPurposeIssues
Thermaltake LitePower 500W (x3)2013-2014General use
Antec HCG 5202014Gaming PC
Antec Neo Eco 450C2014General use
Seasonic G-6502015Gaming PC
Antec TPC 550 Gold (x2)2015, 2016General use/Gaming PC
Corsair CX-4302016General use

Saturday, July 23, 2016

Trying to Evaluate the Thermaltake LitePower Gen 2

I noticed that Thermaltake have release another LitePower power supply, this one labelled the "Gen 2".

The way Thermaltake uses the LitePower for branding is frustrating, as there have been dozens of them over the years, by five different OEMs, and of markedly different quality. In general they're a last resort kind of PSU, so I was interested to see if this new one might have improved.

Unfortunately it was pretty difficult to find out anything useful. The awesome RealHardTechX database currently doesn't list a Gen 2, and no one appears to have reviewed it yet. The specs are also lean on detail (which is sadly normal for most PSU brands). The addition of 2x6+2 pin connectors on even the 450W model is much more promising than the previous OEM versions of the LitePower.

I asked Thermaltake for a bit more detail on 19th July 2016 — as yet there has been no response, but I'll update if anything comes through.

Thursday, July 21, 2016

Turning Off Wake-On-LAN on Linux Laptops

I noticed my Dell Latitude laptop running Kubuntu 16.04 that even after shutting down completely, the battery was still being drained. The problem is that wake-on-lan is generally turned on by default. Unless you need WOL for some reason — turn it off.

Andi Dittrich has a great article on how to disable wake-on-lan in post 15.10 Ubuntu systems (you need to use a different method if still using versions older than 15.10).

The core method is to create a file named wol.service in /etc/systemd/system/ with:

[Unit]
Description="Disable WOL"

[Service]
Type=oneshot
ExecStart=/sbin/ethtool -s wol d

[Install]
WantedBy=multi-user.target

Then run: sudo systemctl enable wol.service

Run sudo ethtool and check it shows "Wake-on: d" after reboot to ensure it has worked.

Sunday, June 12, 2016

Prebuilt Computers: Understanding Prices to Protect Yourself as a Consumer

If you're in the market for a new computer and can't build it yourself, it pays to understand a bit about the parts that go into a computer, and what the going rate is for the parts in any particular machine you might be looking at buying.

Buying a pre-built computer is fine if you choose the right one. They often come with sub-standard parts — particularly in important areas like the power supply — but you can find good options. Shops tend to charge anywhere from $50 upwards of $200 for putting it together, with $100 being about average.

Some shops border on the ridiculous though. As an example, here is an advertisement on gumtree for a pre-built computer (google cache link in case the ad disappears). Here's a list of the parts included in the computer, with approximate "going rate" prices for each of the parts that can be purchased locally in South Australia:

  • CPU: Intel i3 6100 $160
  • Motherboard: unknown, assume middling H110 $90
  • RAM: 8GB DDR4 2133MHz $50
  • HDD: WD 1TB $70
  • ODD: DVD-RW $20
  • Case: Coolermaster K282 $60
  • PSU: Corsair VS350 $50
  • OS: Win 10 Home $140

That comes to $640. The price being asked? $1149! That's nearly double the retail price of the parts, or a build fee of $500.

That's a very expensive deal. Don't get caught with stuff like this.

Wednesday, June 8, 2016

Reverting Shutdown Shortcut in Kubuntu 16.04

The updated version of KDE/Plasma in Kubuntu 16.04 changes a number of the default shortcuts compard to those in 14.04. One of the main one I'd muscle-memoried is Ctrl-Alt-Del to initiate a shutdown. There is a way to get this back in 16.04, just requires a couple of steps.

  1. Open the Global Keyboard Shortcuts dialog. Select "ksmserver" from the KDE component dropdown. Click the "Log Out" entry. Define a custom shortcut to whatever is preferred. Press Apply.
  2. Open the Desktop Session Login and Logout dialog. In the Default Leave Option section, check "Turn off computer".

Now the option to shutdown will be the default option.

Wednesday, June 1, 2016

Fix KDE Unreadable Tooltip Text/Background Colours in Firefox

In a recent update to Firefox (v46), when running under KDE on Kubuntu 14.04, the choice of text colour when hovering over images or other items in the browser that pop up a tooltip was essentially unreadable. Here's an example:

This is due to Firefox (for whatever reason) using the "WindowText" system colour rather than the "TooltipText" colour.

There are a couple of ways to fix it. The first is to go into the "Colors — KDE Control Module" and select a new colour scheme that has a better contrast in those two colours. Out of the defaults in KDE, I found Honeycomb, Norway, Obsidian Coast, Oxygen Cold and Zion all looked okay.

The other way is to override the tooltip colours.

On the same dialog, click the "Colors" tab, and find the Tooltip Background colour. If it's a dark colour, change it to something light, or light if it starts dark. You might also want to change the Tooltip Text colour to complement it.

Another option is to change the Window Text colour, but this colour is used in many more places, so will affect the look of all other applications.

This thread on the Arch Linux forum has a lengthy discussion on the issue.

Addendum: for Tree Style Tab users, changing the colour settings doesn't help. The selected tab highlights itself using the Window Text colour, the same colour as the text. To get around that one I changed to the Oxygen theme, rather than the default theme. That fixes most things up, but some sites override the colour of the text in dropdown boxes, but don't override the background...so it becomes close to unreadable. Annoying.

Saturday, April 16, 2016

Coolermaster Silencio 352: Case Notes

A few quick notes on the Coolermaster Silencio 352, which I used for the first time recently:

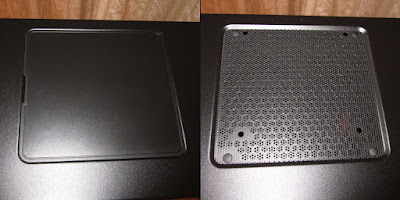
It's a micro-ATX (so relatively small) case aimed at quiet computing. Pictures on the net often make it look glossy, but it has a matte finish. It does show some fingerprints, but not nearly as much as you'd think from some pictures.

The side panel had quite a lot of flex to it — the thumb screws were under a fair bit of tension. It's a budget case, the flimsiness of some of the material shows in this. The side panel has about 3–4mm of noise-absorbing foam.

The case is aimed at quiet computing, and it is pretty quiet. You need to be in a quiet room to even tell it's on. However, with only a minimal setup of i5-6600, one SSD, HDD, DVD drive and the PSU, CPU temperature got really high under load, up to 80°C. I'm not sure how it would go with a graphics card in there as well, so I wouldn't recommend this case for a gaming machine.

You can remove a panel at the top with an optional fan mount, which might make airflow slightly better.

Finally, there is very limited space at the back of the case behind the motherboard. This makes cable management really difficult. But it doesn't look too bad when finished up.

Saturday, April 2, 2016

Setting up a Flash Drive to UEFI Boot Linux (from an ISO)

Update 27/1/2017: A slightly simpler variant for flashing an ISO when targeting legacy BIOS PCs

The following process may be a bit cumbersome (I'm sure it could be cleaned up to use a minimal set of tools and/or have the interactive parts automated), but it works to allow a current Linux distro (I was using Kubuntu) to boot from a USB flash drive on a Dell laptop with a recent (Skylake) CPU via UEFI with SecureBoot turned on.

  1. Plug in the flash drive and find the device number (using lsblk or fdisk -l). In the following example I'm using /dev/sdc as that was the device allocated to my flash drive. If you get the device wrong, you could trash your system using the steps below!
  2. Delete everything on the flash drive to freshen it up, and create a new msdos partition:

    sudo parted /dev/sdc mklabel msdos

  3. Use fdisk to interactively add a new partition. The commands look something like this, where most of the values are defaults:

    $ sudo fdisk /dev/sdc

    Command (m for help): n
    Partition type:
    p primary (0 primary, 0 extended, 4 free)
    e extended
    Select (default p): p
    Partition number (1-4, default 1): 1
    First sector (2048-15633407, default 2048):
    Using default value 2048
    Last sector, +sectors or +size{K,M,G} (2048-15633407, default 15633407):
    Using default value 15633407

    Command (m for help): w
    The partition table has been altered!

    Calling ioctl() to re-read partition table.
    Syncing disks.
    $

  4. Create a FAT32 partition on the drive:

    sudo mkfs.vfat /dev/sdc1

  5. Create a mount point for the drive:

    sudo mkdir /mnt/flash
    sudo mount -t vfat /dev/sdc1 /mnt/flash -o rw,umask=000

  6. Extract the ISO to the flash drive (this will take a while):

    7z x kubuntu-16.04-beta2-desktop-amd64.iso -o/mnt/flash

  7. Set the boot flag on the flash drive:

    sudo parted /dev/sdc set 1 boot on

  8. Unmount the flash drive so it's ready to be removed and used:

    sudo umount /mnt/flash

Further reading on the various steps used above:

Wednesday, March 2, 2016

Skylake i5-6600 Power Consumption Tests

Another machine with a few different parts but somewhat similar to the previous Skylake power consumption test I did.

System specs: i5-6600, Asus B150M-A, 2x8GB DDR4, 1x240GB Intel 535 SSD, 1xWD Blue 1TB, 1xLiteOn DVD-RW, Antec TPC 550W, Coolermaster Silencio 352. Power measurements were made from the wall (240V AC) with a PowerMate Lite.

Machine StateConsumption (W)VAPFC
Off1.5 W16.20.092
Idle30 W45.90.65
Prime 95
(Large FFTs, 4 threads)
108 W1150.939

The above values are typical. Peak recorded draw was 119.5W. Maximum temperature hit was 80°C. During Prime95 the core frequency fluctuated between 3389 MHz and 3491 MHz.

Not sure why the power usage was so much more than the 6500 system. I guess the combination of faster CPU, different motherboard, extra RAM, fan and SATA drives (even though they were at idle) and warmer "silent" case all contributed to the increase.

Thursday, February 25, 2016

Fix UEFI Boot on Surface Pro if you've Installed Linux

At work I wanted to test run Linux on a Surface Pro 3. I installed Ubuntu Gnome 14.04 to a flash drive so I wouldn't disturb the Windows install, ran it up a few times, played around, etc., then unplugged the flash drive and tried to boot back into Windows.

Got the "Minimal BASH-like line editing is supported..." grub error message.

Seems that, due to the way UEFI work with Ubuntu, the EFI partition is mounted in the Linux file system, and grub is half written there, and half written to the "regular" file system in /.

So when the Linux drive is removed, the boot loader is still looking for the Ubuntu install that no longer exists. FML.

The (workaround) fix, it turns out, is pretty easy — but only if you still have access to the Linux install. In my case I did, so I booted up from the flash drive one more time, and did as suggested in this askubuntu answer:

cd /boot/efi/EFI/Boot
sudo mv ubuntu/ ubuntu~

This will cause the bootloader to fall back onto the Windows install when it can no longer find the Ubuntu one. It's not a clean fix, but it works.

Disappointing that this is how it works in UEFI — one of the golden features of trying a Linux install on a separate drive is that it honoured the existing boot setup so you could revert back instantly.

(As an addendum, I would never buy a Surface Pro 3 myself — they are flaky in all sorts of ways. Yuk yuk yuk).

Sunday, February 21, 2016

How Much CPU Does CS:GO Use?

I ran a quick test on CS:GO to see how much CPU it was using. Turned out to be more than I expected, regularly getting 60-80% on an i5, sometimes in excess of 80%.

This screen cap is taken on my system with an i7 4790K hyperthreading off (aka "i5 mode"), using a GTX970 at 1080p. It was taken during online deathmatch. With hyperthreading on it was similar usage, but only using the 4 real threads makes it easier to see how much the CPU is being used.

If you're looking for a CPU and can afford an i5, it would seem like a quad-core CPU is useful even for an "old" game like CS:GO.

Interestingly though, when running with 2 cores + hyperthreading activated, the usage didn't go up by a whole lot:

This cap is with 2 cores and hyperthreading activated — essentially an i3. It gets into the 80-90% more regularly, but it's not that much more. I can only guess the engine is a bit clever in scaling what it does based on the resources available. I did notice a few frame drops into the low 100s, but the gameplay didn't feel particularly different.

The i7 has a higher base clock speed and a much bigger CPU cache, so it's not a true test for how an i3 would behave

Thursday, February 11, 2016

SSD Status Summary

I was relatively late to the SSD bandwagon — and so seemed to have dodged the worst of the unreliable phase.

Now I detest using a machine without one, and have collected quite a few over the past few years for my own and my family's machines. Thought I'd throw up the status of them all, including when they fail. So far I've had pretty good luck — worst problem was the DOA Patriot Blaze.

Home Use:

DevicePurchasedPurposeIssues
Samsung 830 128GBOct 2012General use/Gaming PC
Samsung 830 128GBDec 2012General use
Kingston V300 60GBMar 2013HTPC
Plextor M5S 128GBAug 2013General use
Sandisk ReadyCache 32GB2014Scratch/test drive
Sandisk UltraPlus 128GB2014General useDied: Feb 2018
Plextor M5 Pro 256GB2014Gaming PC
Transcend SSD370 256GB2015General use
Patriot Blaze 250GB2015Gaming PCDOA — returned for Ignite
Patriot Ignite 250GBAug 2015Gaming PC
Samsung 840 Evo 120GB? (2nd hand 2015)TBD
Transcend SSD370S 128GBJan 2016General use/Gaming PC
Intel 535 240GBApr 2016Work laptop
Intel 330 120GBJul 2016 (2nd hand)General use/GamingPC
Sandisk SSD Plus 480GNov 2016General use

Friday, January 15, 2016

HTPC OS Upgrade

My HTPC was running off a non-LTS distro for a while, finally got around to reinstalling. The process wasn't without hiccups, but overall wasn't too bad.

The two primary applications I run are Kodi (aka XBMC) and MythTV. The Kodi reinstall was easy, MythTV a little trickier to get right. These are the steps I followed:

Initial Install/Setup

  • Reinstall the new OS. I used LinuxMint 17.3 with Cinnamon as I'd been using Mint 15 previously. I also partitioned the existing SSD so that the old install is still available.
  • Set up standard stuff like web browser, terminal config, graphics drivers, etc.
  • Set system audio to appropriate device — as I was using audio over HDMI, the default sound device wasn't the right one.
  • Probably want to turn off the screen saver.

Kodi Install

  • Install Kodi
    sudo apt-get install kodi
  • Copy old ~/.xbmc/userdata directory to new install. Kodi data is stored in ~/.kodi.
  • Start Kodi. User settings like which videos you've watched should be retained. May need to configure the audio settings, I did as I was using HDMI.

MythTV Install

  • Boot back into the old OS install and follow the MythTV database backup procedure. I used:
    /usr/share/mythtv/mythconverg_backup.pl --directory <path_to_shared_drive>
  • Boot back into new OS install.
  • Install MythTV (this will install dependencies like MySQL).
    sudo apt-get install mythtv
  • Recreate the database. Note that this will create the database with a default username and password of "mythtv", which caused problems for me when restoring the database backup in the next step.
    mysql < /usr/share/mythtv/sql/mc.sql
  • Restore the database. Could not get the preferred method to work — it kept failing with a "could not connect to database" error. Could not get mythconverg_restore.pl to connect. At first I thought it was a password issue, but setting the correct password in /home/mythtv/.mythtv/config.xml didn't help. In the end I found this post, which gave the command to manually paste the database backup back. As the mythconverg_backup.pl script gzips by default, I did the gunzip on the backup file before running the following:
    mysql -umythtv -pmythtv mythconverg < backup_filename.sql
  • Run mythtv-setup. I needed to add the TV tuner adapters and sources — so I guess this wasn't part of the backup — and scan for channels. Also add the existing hard drive paths as storage directories.

I had to unplug the tuner (DigitalNow TinyTwin) to get it to appear — not sure why, but other than that the OS upgrade went pretty seamlessly.