Saturday, December 12, 2015

What Can Twenty Bucks Buy You These Days?

What can $20 buy you these days? In the second hand "box of random IT stuff" department, it seems like quite a lot.

I'd been looking around for a cheap low profile graphics card for a while to get an old PC up and running again. Eventually found one offered on the much-maligned-but-often-useful site gumtree.

I found a guy listing a GT220 along with a box of "random stuff" for $20. So I went to pick it up, and was amazed at what I found in this treasure trove. Among the items (keep in mind I really only wanted to graphics card) I discovered:

  • The GT220 graphics card (of course)
  • USB TV tuner with aerial and coax adapter
  • Brand new unopened Display Port cable
  • DVI and VGA cables and adapters
  • PCI wireless card (54Mbps — old and slow, but whatever)
  • SATA/Molex adapter cables
  • Case fan and other 3/4-pin fan adapters
  • Coax splitter and cable
  • AEC power cables
  • Various USB adapters and extenders
  • RJ45 network cables
  • Modem/telephony/RJ11 cables and adapters
  • A smattering of modular power supply cables (from an unknown power supply ;)
  • IDE cables (blastus from the pastus)
  • A whole bunch of audio cables
  • A whole bunch of audio adapter like 3.5mm <-> 6.5mm adapters)
  • A UPS (wtf?). Probably bad battery, but still
  • A label maker (again...wtf?)
  • Random RAM sticks of various (old and most likely useless) denominations
  • A whole bunch of other stuff I couldn't even identify
$20 trove

The trove...some of it at least, already nabbed the best parts

Now, I probably won't ever use much from this smorgasbord of geek hardware wet dream. The funny thing is that many of the parts — like the DP cable, coax cable, USB tuner, USB extension, coax splitters, etc. — I've actually bought previously. So I know they're useful. Just don't know if they'll be useful to me again. Pot luck at its best though!

Maligned because while you get the occasional good transaction (like I did in this case) you also get a lot of time wasters, low-ballers, overpriced, over-bearing, clueless kind of people on both the buyer and seller side.

Friday, December 11, 2015

Grub: Boot from Previous Selection

If you run a dual or multi-boot setup with grub, setting "remember previous boot" is really easy and (I find) convenient as it tends to fit my usage patterns.

Couple of useful references at askubuntu and the grub manual, but all you need to do is make the following changes to /etc/default/grub:

# GRUB_DEFAULT=0
GRUB_DEFAULT=saved
GRUB_SAVEDEFAULT=true

Then run sudo update-grub

Sunday, November 15, 2015

Skylake i5 Power Consumption Tests

Put together a new machine today, and ran a quick power consumption test to see what to expect from the total draw.

System specs: i5-6500, Asrock H170M-ITX/ac, 2x4GB DDR4, 1x240GB SSD, Corsair CX-430, Coolermaster Elite 110. Power measurements were made from the wall (240V AC) with a PowerMate Lite.

Machine StateConsumption (W)VAPFC
Off0.75 W33.50.02
Idle17 W420.4
Prime 95
(Large FFTs, 4 threads)
71 W860.825

In Prime95 the power fluctuated a little, the above entry is a typical value. Peak recorded draw was 73.5W. Maximum temperature hit was 58°C. HwMon recorded individual cores at 3.6GHz, but under Prime95 load they all stuck around 3.3GHz.

You could happily run this machine on a 90-100W power supply. The smallest commonly available PSUs retail tend to bottom out at 350W, which is massive overkill in a system without a dedicated GPU.

(Also, the PFC of the CX-430 — ouch!)

Sunday, November 8, 2015

HTC M8S Versus Samsung Galaxy S3

TL;DR: Fixes some of the issues I had with the S3; not without its flaws.

After moving from the Samsung Galaxy S2 to the S3 a few years ago, I was disappointed that in a lot of ways the "upgrade" was most definitely a downgrade. Primary issues were lack of FM Radio (didn't even think to check!) and MTP support was so flaky on Linux I could barely copy files onto the phone — Samsung made it that you could no longer treat the S3 as a plain old USB device, MTP being the only option.

The HTC M8S "infinite selfie" selfie

So this time round I've jumped to HTC, and while I really wanted to like it, there are definitely pros and cons.

M8S advantages:

  • Copying files to the phone from a Linux machine just works.
  • Side-by-side the speaker in the M5S is much clearer. The S3 is distorted in comparion — this is a two-year-old phone though, so this is likely from wear and tear.
  • FM Radio. I had this in the Galaxy S2 and liked the option. We pay a premium for data in Australia, so streaming radio over the internet isn't as practical as it might be in other places. So the radio option was really handy for casual listening, missed it in the S3, glad it's in the M5S.
  • The setup wizard seemed pretty user friendly, offering to transfer content from the old phone and to set up various accounts. Since I like to start fresh and don't really do "social" whatevers, I didn't use any of it, but hey, the thought was nice HTC.

Negatives of the M8S:

  • No physical access to the battery. Not sure what you're meant to do if there are any problems with the stock battery.
  • The default camera settings seem...awkward. Difficult to get decent focus and "nice" looking shots — never really found a phone that was good for photos/video though, could just be user error.
  • The USB tethering option on the S3 would switch itself off once unplugged. On the M8S it stays on so if you plug it into another computer it'll activate the tethering again. Not what you want if you (as I do) go from the machine I want to tether to a desktop that has an ethernet connection.
  • Switching between vibrate, silent and audible sound profiles is hidden away in the Settings menu system. The S3 had that as an option on the main shutdown/reset screen.
  • Auto correct when typing seems pretty aggressive. So far I haven't worked out how to keep the suggestions (which can be useful) but hold off on the actual correction.
  • Background data is turned on by default — again, in our expensive data environment this is bound to annoy people when their quotas are sucked dry by stuff they're not even using. Turning it off is hidden away in the data settings, and then there's a constant notification to say "background data restricted" — haven't found how to get rid of the notification. I know it's off, I turned it off. The damn phone doesn't need to constantly remind me.
  • In general the phone is notification happy: notifications all the time, with seemingly no control over acknowledging them. The notification system feels pretty all-or-nothing in that regard.
  • The power button is on top rather than on the side. Muscle memory needs time to adapt :|

The M8S fixes a number of the sore points I had with the S3, but brings its own annoyances. So overall...it's good (in the sense that all modern phones are marvels of technology) but not great I guess.

Monday, November 2, 2015

How to Choose a Replacement Socket 1155 Motherboard

In another what I assume is a soon-to-be-deleted superuser question, due to the affectations of the moderator squad there, a user asked:

"I have a socket 1155 motherboard (P67 chipset with i5-2400) that died. What do I need to consider for a replacement?"

Here's my answer (extended a little here to try and cover all bases), in case it helps anyone else going through the same process:

The i5-2400 will work with pretty much any socket 1155 motherboard, so you can look at the boards that were released with SandyBridge CPUs — for example, H61, H67, Z68 — as well as those that were released for IvyBridge CPUs, such as B75, H77, Z77.

Most board manufacturers have a CPU compatibility list for each board, so if you find a particular board, you should be able to confirm by searching for the make/model.

Given that they're not made any more, finding a "good" replacement might be tricky. As long as the motherboard has all the ports and sockets you need, it should do the job. In the general case, some of the factors that should be considered:

  • What sized case do you have? Physical size is imperative: An ATX motherboard won't fit in a micro-ATX sized case, for example. A board that is otherwise suitable must fit the case, otherwise it is pointless to consider it.
  • Number of and/or combination of PCI and PCIe slots required. All current motherboards have at least one PCIe x16 slot for a graphics card, and keep in mind that most graphics card take up at least two slots.
  • Number of RAM slots required. Some low-end boards only have 2 RAM slots — if you have more sticks than that it might mean you either have to reduce your amount of RAM, or buy a new kit with larger size per stick.
  • Number of SATA ports. Most drives (hard drives, DVDs, and SSDs) around in the socket 1155 timeframe used SATA as the connector type. Make sure the motherboard has enough SATA ports for all your drives.
  • Number of USB ports required. In addition the ports on the motherboard, consider what USB ports your case has. Any USB 3 ports will most likely require a USB 3 header on the motherboard, which are physically different sizes to USB 2 headers.
  • Number and type of onboard graphics ports. If not using a dedicated GPU, consider what types of onboard graphics connectors you need.
  • Number of fan headers. Required for case fans
  • Chipset matching to avoid confusing your operating system. You may want to attempt to match the existing board — by chipset and/or manufacturer — in order to reduce the risk of your operating system from "rejecting" the change.
  • Overclocking support. If overclocking with a 'K' CPU, choose a 'Z' chipset

Most DDR3 RAM will work with any board, but you can also try and confirm RAM compatibility either with the motherboard or RAM manufacturer's compatibility lists.

The i5-2400 which has limited overclocking potential is a little easier to source a replacement that for an overclockable 'K' CPU. In the latter case, the Z68 or Z77 boards are the best choice as they support overclocking.

2nd hand is most likely a cost-effective option if you can find one. Some socket 1155 boards are still available at online stores, so you could check Newegg, Amazon, and similar places. Alternatively, you could call a few local computers stores to see if by chance they've got old stock.

As an example of the process: here's a listing for the Gigabyte B75M-D3H at Amazon. The CPU support list shows that the i5-2400 is supported. It has 4 RAM slots, and after the GPU is in will have a PCI and PCIe slot free. It is only micro-ATX sized, so should fit all but the smallest cases.

When replacing, if you change the make and model of the board, you may have difficulty booting your OS with the updated board. This depends what OS you're using, and how different the replacement board is as far as drivers go. Windows traditionally hates hardware being replaced, and may refuse to boot; if you were using, say, Linux it would most likely just work. So keep that in mind that some recovery — or worst-case, a reinstall — of the OS might be required. Finding an exact model motherboard should avoid this issue; finding a similar chipset should reduce the risk of boot issues (but licensing issues may still need to be dealt with).

During the replacement process, after removing the heatsink, clean existing thermal paste from the CPU and heatsink using isopropyl alcohol. Reapply fresh paste before putting the cooler back on the CPU when it's installed in the new motherboard.

(As an aside, confirming that a motherboard fault is the problem — and not something else like a dead power supply — is a worthwhile activity to go through first).

Wednesday, October 21, 2015

Goat Simulator and GoatZ on Xubuntu

A family member had been running Goat Simulator on an old Q6600 + HD7770 machine, but found that the GoatZ DLC add-on just wouldn't work. It continually crashed with the dreaded "goatgame-win32-shipping.exe" error.

None of the suggested fixes I could find (verify cache; update graphics drivers; reinstall; tweak some shader settings) had any effect. Although Vista is still officially supported, it may have been something to do with that. Since the machine was dual-booting with Linux, and Goat Sim now has a Linux target, I just installed it on there.

Ran fine using the current AMD fglrx drivers in Xubuntu 14.04. Bit of glitchiness in the water rendering, but nothing that couldn't be ignored.

Really the only issue was the mouse sensitivity in-game. I've found this with other games based on the Unreal Engine, the mouse speed goes way down. I fixed this by tweaking the mouse speed in the desktop using xset:

$ xset m 4/1 0

(Basically, followed the advice from this thread).

Sunday, October 4, 2015

GUI Markdown Editor/Viewer

Markdown is a common format for writing readme files on hosting sites like github and bitbucket. Browsers don't have a notice in-built rendering yet though, so I was looking for something to preview the files rather than having to push-to-test on github or bitbucket.

This answer on Unix & Linux Stack Exchange suggested ReText, and I found it was pretty close to what I needed. Ctrl-L shows a live side-by-side preview of the markdown being edited.

On Debian-based distros it can be installed with:

sudo apt-get install retext

Thursday, August 13, 2015

Conky With a Vengeance

Yet another little tinker update on the Conky config since the last one.

Here's the full .conkyrc. Of course blogger munges the output, so I've noted long lines with the character; there should actually be no line break on those lines:

background no
font Sans:size=8
use_xft yes
xftalpha 0.9
update_interval 5.0
total_run_times 0
own_window yes
own_window_type normal
own_window_argb_visual true
own_window_argb_value 196
own_window_transparent no
own_window_hints undecorated,below,sticky,skip_taskbar,skip_pager
double_buffer yes
minimum_size 220 1200
maximum_width 220
draw_shades yes
draw_outline no
draw_borders no
border_inner_margin 5
#border_inner_margin 20
draw_graph_borders yes
default_color CDE0E7
default_shade_color black
default_outline_color green
alignment top_right
gap_x 12
gap_y 0
no_buffers yes
uppercase no # set to yes if you want all text to be in uppercase
cpu_avg_samples 2
override_utf8_locale no

TEXT
${voffset 1} ${voffset -1}

${color gray}${font Sans:size=10}${voffset 5}${time %d-%b-%Y}${font}
    ${font Sans:size=12}${voffset -5}${alignr}${time %I:%M %p}${font}

${color white}SYSTEM ${hr 1}${color}
Hostname: $alignr$nodename
Kernel: $alignr$kernel
Uptime: $alignr$uptime
MB Temperature: ${alignr}${iconv_start UTF-8 ISO_8859-1}
    ${exec sensors|grep 'Physical id 0'|awk '{print $4}'}${iconv_stop}
CPU Temperature 0: ${alignr}${iconv_start UTF-8 ISO_8859-1}
    ${exec sensors|grep 'Core 0'|awk '{print $3}'}${iconv_stop}
CPU Temperature 1: ${alignr}${iconv_start UTF-8 ISO_8859-1}
    ${exec sensors|grep 'Core 1'|awk '{print $3}'}${iconv_stop}
CPU Temperature 2: ${alignr}${iconv_start UTF-8 ISO_8859-1}
    ${exec sensors|grep 'Core 2'|awk '{print $3}'}${iconv_stop}
CPU Temperature 3: ${alignr}${iconv_start UTF-8 ISO_8859-1}
    ${exec sensors|grep 'Core 3'|awk '{print $3}'}${iconv_stop}
Fan 1: ${alignr}${hwmon 1 fan 1} RPM
Fan 2: ${alignr}${hwmon 1 fan 2} RPM
GPU Temp: ${alignr}${exec nvidia-smi | grep '. ..\% ..C'|
    awk '{print $3}'}${iconv_start UTF-8 ISO_8859-1}°${iconv_stop}C
Processes: ${alignr}$processes ($running_processes running)
Load: ${alignr}$loadavg

${color yellow}CPU LOAD ${hr 1}${color}
${color b0b000}CPU Frequency: ${alignr}${freq} MHz
CPU1 ${alignr}${cpu cpu1}%
${cpubar cpu1}
${cpugraph cpu1 000000 ffffff}
CPU2 ${alignr}${cpu cpu2}%
${cpubar cpu2}
${cpugraph cpu2 000000 ffffff}
CPU3 ${alignr}${cpu cpu3}%
${cpubar cpu3}
${cpugraph cpu3 000000 ffffff}
CPU4 ${alignr}${cpu cpu4}%
${cpubar cpu4}
${cpugraph cpu4 000000 ffffff}
${color b0b040}CPU All
${cpugraph cpu0 000000 ff0000}${color}

${color 30b030}RESOURCE USAGE ${hr 1}${color}
${color 30b030}RAM ${alignr}$mem / $memmax ($memperc%)
${membar 4}
Swap ${alignr}$swap / $swapmax ($swapperc%)
${swapbar 4}${color}

${color gray}Highest CPU $alignr CPU% MEM%${color}
${top name 1}$alignr${top cpu 1}${top mem 1}
${top name 2}$alignr${top cpu 2}${top mem 2}
${top name 3}$alignr${top cpu 3}${top mem 3}

${color gray}Highest Memory $alignr CPU% MEM%${color}
${top_mem name 1}$alignr${top_mem cpu 1}${top_mem mem 1}
${top_mem name 2}$alignr${top_mem cpu 2}${top_mem mem 2}
${top_mem name 3}$alignr${top_mem cpu 3}${top_mem mem 3}

${color white}FILE SYSTEM ${hr 1}${color}
Root: ${alignr}${fs_used /} / ${fs_size /}
${fs_bar 4 /}
Files: ${alignr}${fs_used /files} / ${fs_size /files}
${fs_bar 4 /files}

${color white}NETWORK ${hr 1}${color}
Eth0: ${addr eth0}
Down ${downspeed eth0} k/s ${alignr}Up ${upspeed eth0} k/s
${downspeedgraph eth0 25,107} ${alignr}${upspeedgraph eth0 25,107}
Total ${totaldown eth0} ${alignr}Total ${totalup eth0}

Friday, August 7, 2015

Superuser, Moderation, and Should I Bother

I just noticed tonight that an answer I did on superuser.com has been moderated into oblivion. It had 17 up votes, earning a "Nice Answer" badge, so some people at least felt it was useful.

While I can understand the intention behind the aggressive pruning that occurs, it's just...really disheartening having put some effort into answering as best I could in a precise, useful way, only to have it shitcanned. Especially when to my way of thinking there were a number of things in the answer that would have more longevity than other questions that survive just fine on SU.

So, for posterity, here's my answer. The question was regarding any potential issues with the asker's new PC build, which included common parts like an i5-4570, Gigabyte B85M-D3H, Kingston RAM, GT610, WD Green, and a fairly crappy looking case/PSU combo.

There are a couple of general rules of thumb you should follow when speccing your machine:

  • Don't cheap out on the power supply. I have no idea what is included in that case (specs are not forthcoming), but the price is so much cheaper than many budget cases that come with no power supply, I'm inclined to think that it is very low quality. Unless you are in dire need to save money, look for a separate PSU like a Seasonic. Many Antec or Corsair PSUs are good, as are some Coolermaster or Thermaltake. If you need to get a case/PSU combo due to budget, look for something like the Thermaltake Versa series.

  • Current onboard graphics (which is built into the CPU and accessed via the ports on the motherboard) is better than a low-end GPU like the GT610. Age of Empires doesn't need much graphics power, so I think you'll be fine with onboard graphics. The disclaimer is perhaps you want a cheap GPU for experimentation purposes, targeting your software to particular graphics card or something.

  • The CPU and the GPU are the two biggest parts that determine what kind of power supply you need. The system as specced above will use <150W even at maximum load. A good quality 350-450W PSU is where you should be looking, unless you want to support upgrade to a high-end gaming graphics card in the future — if so, look for 500-600W.

  • The motherboard you have chosen can only run RAM at 1600MHz, so the 1866MHz will clock back to that anyway. You could get a 1600MHz with CL9 timings (lower the better for timings), only a very minor difference in performance though.

  • Most modern consumer CPU/motherboard use dual channel RAM, you will get a mild performance boost by getting 2x4GB of RAM.

  • Get an SSD if you can and install the OS/applications on it. Use the HDD for storage. SSDs are awesome, particularly if you do dual-boot, as they reduce boot times and application load times significantly.

  • If you can't get an SSD due to budget, don't use a 5400RPM hard drive like the Caviar Green as your boot drive, they are very slow. A WD Caviar Blue (for example) is a better option.

  • Consider a Virtual Machine for doing the Linux development if dual-booting gets annoying. Unfortunately VMs are bad for games, so you can't really do it the other way around. Alternatively, you could consider running the games under wine in Linux. AoE III for example appears to have pretty reasonable support. Dual-booting is pretty annoying in my experience if other options are available.

Edit:

  • Since it's your first time putting one together too, I'd suggest watching a few videos on how to do it (search youtube for "how to build a computer" or similar). Will give you a feel for how everything fits together.

The whole thing is still available in the google cache in case anyone is particularly interested.

Saturday, June 13, 2015

Retro Reviews: Logitech G105 and K290

I got these keyboards nearly two years ago but only just found my notes on them, thought I'd post it anyway.

G105 Initial Thoughts: It's a rubber dome keyboard, so the keys are a little bit "squishy", but not too bad overall. It has LED backlighting if you want it — the LEDs are not very bright though. Lots of keys for gaming macros or whatever. The position of the keys down the left-hand-side was somewhat annoying at first until I got used to them.

The G105 has survived nearly two years of gaming use without fault, so its longevity seems reasonable. A lot of my other Logitech peripherals have failed at or before this period, so I'm a bit wary of the brand at the moment but this particular keyboard seems okay. The feel of the keys is not really any better than a $20 keyboard, so you have to balance up whether the extra macro keys and backlighting (and potentially the longevity) is worth a $50 keyboard.

K290 Initial Thoughts: Has a fairly hard, angular wedge shape. The bright blue USB cable doesn't look very good. The feel of the press on the "low profile" keys is difficult to get used to. It's difficult to describe, but the keys feel gritty or chalky to press, like you're pushing them through a crumbly layer of dried mud.

Appearance and feel aside, the thing I like least about the K290 is that to use the function keys (F1, F2, etc), you need to hold down the Blue "FN" key. Really awkward when on the vast majority (all?) keyboards the F keys are the default. This is the most difficult thing to get used to when swapping between other keyboards.

While the K290 has worked fine so far, I wouldn't buy it again due to the negatives I found while using it.

Don't have a pic of the K290 unfortunately, the above image and link is to the Logitech product page

Saturday, June 6, 2015

Review: Deepcool Tesseract

Recently used this case in a general purpose machine for a friend. At only A$49 it's at the budget end, but for what you get it's pretty good value. With 165mm CPU and 310mm GPU clearance it'll fit most setups.

For whatever reason, the Tesseract listing on Deepcool's website doesn't show the windowed version of the case, only the regular version.

Positives
  • Lightweight, but doesn't feel too flimsy.
  • The fans have both 3-pin and 4-pin molex connectors. Handy if you need it, but could be a negative if you only want the 3-pins as the molex connector is quite bulky.
  • Even when plugged into via the 4-pin, the fans were pretty quiet.
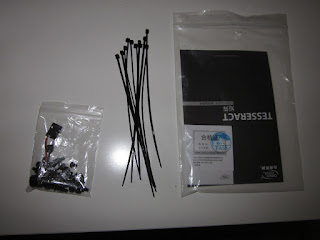
  • Lots of screws, cable ties and an onboard speaker for troubleshooting. (No rubber mounting grommets for hard drives or anything, but you can't have everything in such a cheap case).
  • Internal USB and case button cables are quite long.
  • Plenty of drive bays and room internally.
  • Cutout behind the motherboard to mount a CPU cooler if needed.
  • Large window to show off to show off your insides.
Negatives
  • "Punch out" PCI expansion slots, rather than ones held in place with screws.
  • No cut out at the top of the case for the 4/8 pin ATX power cable, so you need to route around the motherboard. (This is pretty common in cases in this range).
  • The short fan cable on the front-of-case fan would be tricky to reach the 3-pin header on an ATX motherboard.
  • The blue LEDs on the fans and the "power on" at the front of the case are all quite bright (could be considered a good or bad thing, depending on how much you like blue LEDs ;)
  • Not a whole lot of cable routing room at the back.
  • The connectors on the front of the case work okay, but do look a little cheap.
Summary

A good budget case where the value proposition and positives easily outweigh the negatives.

Friday, June 5, 2015

Image Overlays in reveal.js

Update notice: I've noticed this page is getting a few hits, so I've done an update with an alternate technique that I've used in preference to the one below, which had some issues with scaling at different resolutions.

reveals.js is a fantastic little library for creating web-based presentations.

While putting a presentation together I was trying to work out how to quickly throw up images as overlays over the presentation text at the start of a slide, and then disappear to reveal the text.

With the help of a colleague, we worked out a couple of techniques you can apply using the reveal.js "fragment" and "current-visible" option combined with an absolute position.

Option 1 simply overlays the image and has it disappear as the next action in the presentation:

<img class="fragment current-visible" src="image.jpg"
style="position:absolute; left:210px; top:100px;"/>

For Option 2, I added a link so you can get the full-sized image if you want:

<p class="fragment current-visible"
style="position:absolute; left:120px; top:100px;">
<a href="image.jpg"><img src="image.jpg" width="1024"/></a></p>

The way reveal.js scales a presentation to a nominated size in the configuration means the absolute positioning isn't as bad to work in as it would be in a "normal" web page, you only have to get the position right once for the desired image width and it will work due to the scaling factor. It may not be the most elegant way, but it works pretty well.

Okay, let's be honest, my colleague worked it all out, I just watched. Thanks GD!

Prevent Service Autostart on Linux

I installed JIRA last year but haven't ended up using it a lot, so I thought I'd stop it from starting automatically at boot. This wasn't immediately obvious how to do as the service command doesn't have that option.

This seems like a pretty definitive answer, but I ended up going with sysv-rc-conf as it seemed kind of easy to use and visualise everything that's going to be started.

The initial state for JIRA looked like this:

By unchecking everything, it no longer starts up by default:

Sunday, May 3, 2015

Canon MG-6250 Scanning in Kubuntu 14.04

Had to scan something today (first time in a long while), and wondered if I'd have to go through the process I needed to last time on Xubuntu 12.10.

Turns out the MG-6250 works out of the box with Skanlite on Kubuntu 14.04. No configuration required, it searched the network and found the printer, click Scan -- go.

Friday, April 3, 2015

Sorting a Bunch of Images by Resolution

I'd collected a heap of desktop wallpaper images over the years, and wanted to sort them by resolution.

This is the best way I found to do it, using the identify command from the ImageMagick tools. Of course I had to tweak it a little bit for my own purposes, namely to capture .jpeg files as well a .jpg, and to copy the files rather than move.

Script I ended up using:

#!/bin/bash for image in ./*.{jpg,jpeg} ; do res=$(identify -format %wx%h\\n $image); mkdir -p $res; cp -p $image $res; done

Monday, March 2, 2015

Setting up Asus RT-AC68U with Billion 7401VGP-R3

I'd been finding the wireless capability on my Billion 7401VGP-R3 was starting to degrade. Mainly that after a period of being on, it would occasionally start dropping devices and then not let any new ones connect until it was rebooted. Update to latest firmware didn't help.

The modem capabilities of the Billion were good, and I wanted to keep the VOIP capability to run the home phones. So I looked at AC wireless router options, and the Asus RT-AC68U got the nod as a good quality option.

There are a couple of possible ways to set up the AC68U so that it works with another modem/router like the Billion. One way is to turn off DHCP on the Asus and plug an ethernet cable into port 1 (rather than the WAN port) and likewise connect it to the Billion the same way. This allows the internet connection to get through, but takes up one of your ethernet ports.

The way I ended up running it (thanks to the tip from Pete at Whirlpool) was to turn on "Access Point (AP) mode", accessible Advanced Settings -> Administration tab in the router config.

Screenshot selecting Access Point mode

After changing to this setting, it will ask how you want to set up the IP address of the AC68U itself. You can let the DHPC-capable router on the network do it (which in this case I kept as the Billion), but since I'd already "lost" the AC68U once during the setup process by an automatic IP address change, I decided to keep it manually set:

(Incorrect) Manual IP settings for RT-AC68U

So far I haven't had any issues with this setup.

I had one issue, where the AC68U would occasionally drop one of the wireless connections and then seem to reboot. I think it was due to the Billion router allocating the same IP address to another device as the one I'd manually set on the AC68U. This was a bit silly by me, so I updated it to one well outside the Billion's DHCP range. For whatever reason it required a gateway address this time too. So far these settings have proven okay.

Updated settings below:

(Updated) Manual IP settings for RT-AC68U

Here's a colourful diagram of the entire network setup:

Sunday, March 1, 2015

PCT-MP4711 KVM: Nice experiment, not without problems

UPDATE 8/3/2015: The system exhibited similar (though far less pronounced) symptoms without the KVM being plugged in, so it may have been the mouse starting to fail that caused the dropped connections. I've tried a new mouse and it seems okay, but still need to set everything back up again with the KVM to clear its name.

While it looks like I was too hasty on the judgement, the frustrations with the device still stand. Post title updated to reflect the discovery.

A little over 12 months ago I bought a PCT-MP4711 4-port DVI/USB KVM to switch keyboard/mouse/monitor between two or more machines.

In the last week I started noticing some drop outs where the mouse/keyboard would lose "sync" for a few seconds. While working this is annoying, while gaming it's catastrophic. By coincidence I'd just installed a new router at the same time, so I initially thought it was a network issue, but have now proven it was the KVM.See above: perhaps not

Don't look at me!

I noted at the time that the 1 year warranty was a bit worrying, and it turns out I was right to be worried. It lasted essentially the 12 months and a few days before becoming unusable. You get what you pay for, etc, etc.

The thing always was a bit temperamental — particularly the key-based shortcuts to switch between settings. Sometimes you'd have to press the combo three, four, five times or more to get it to register. And sometimes it would stop working and require the USB connectors (which give the box its power) to be disconnected to reset the thing.

In the end it was an okay experiment, but I don't recommend anyone buy PCT equipment based on my experience. Unfortunately other equivalent options are much much more expensive, so while it was an okay stop-gap, the lack of longevity is a major let down.

Monday, February 9, 2015

Raspberry Pi B: HDMI Resolution and Localisation Fixes

Following up from yesterday's post on the Raspberry Pi B, I've played around with it a little more and noticed under Raspbian the screen resolution was running at 1776x952 rather than 1920x1080, and that the keyboard was set up for British layouts.

Resolution Fix

To fix the resolution I got into the /boot/config.txt and made a few changes as per various suggestions from the web. First of all you need to run tvservice -m CEA to find the preferred monitor settings. Mine was 16, but replace the text below with the appropriate number. (May also need to run tvservice -m DMT depending on your screen type. DMT is hdmi_group=2 for the settings. See: difference between CEA and DMT.

The summary of changes to /boot/config.txt:

disable_overscan=1
hdmi_drive=2

#overscan_left 24
#overscan_right 24
#overscan_top 16
#overscan_bottom 16
#disable_overscan=0

hdmi_group=1
hdmi_mode=16

The first two lines were already in the file, and just needed to be uncommented. The commented out lines about were in the NOOBS generated section at the bottom. NOOBS default seemed overly aggressive, so I took them all out. The last two lines are the results of the CEA output from above for the preferred setting.

Keyboard Localisation Fix

Default to British keyboard layout causes problems here in Aust because the # key is turned into £ and the @ and " keys are transposed. To update, run the following:

dpkg-reconfigure locales
dpkg-reconfigure keyboard-configuration

Both bring up little text-based wizards. For locales, select en_AU.UTF-8 or similar. For the keyboard config, I selected a generic match for the keyboard I was using, but I think the main thing is to change the "GB" setting to "US" keyboard layout.

Saturday, February 7, 2015

Raspberry Pi 2B Installation

Having played with a BeagleBone Black a while back, I thought I'd try out the newly released Raspberry Pi 2. Quad core CPU with 1GB of RAM sounds like it should be plenty grunty for SoC computer.

The Raspberry Pi 2B

Here's the process I used to set it up. I tried both Snappy Ubuntu and Raspbian. Since Snappy has no desktop at the moment, and that's the main thing I wanted to try out to start with, I basically satisfied myself it was working and then jumped over to Raspbian.

In addition to the Pi itself, you also need the following:

  • A micro-USB power supply — basically, a phone charger. I got a 2A one from Element14 with the Pi.
  • A microSD flash card. I got a 16GB Patriot that came with a USB adapter to make it easier to copy files to/from. You could also use a card reader if your computer has one.
  • Keyboard/mouse/monitor.

2A microUSB power adapter

Installing Snappy Ubuntu on the Pi

This install is using a Linux desktop computer to set up the Flash card. I'm sure there are guides out there for Windows/OSX if that's how you roll. OSX may be similar enough that the command-line options will work too, I'm not sure.

  • Download Snappy Ubuntu Core from http://www.raspberrypi.org/downloads/
  • Unzip the downloaded zip file to get at the pi-snappy.img.
  • Insert the flash drive into your computer.
  • Find out the device name using something like df if it automounts or fdisk -l if not. It will be called something like "/dev/sdc1". Drop the number at the end for the commands below — you need to flash the entire drive, whereas sdc1 is the first partition on the drive.
  • Unmount the flash drive if you need to.
  • From the command-line, run the following (replacing "sdc" with your device):
      $ sudo dd bs=4M if=pi-snappy.img of=/dev/sdc
    
  • It might take a while to flash the img. Play a game or something while you're waiting.
  • Run sync to flush the drive. (I forgot to do this and it still worked...)
  • Take out the flash drive and put it in the Pi. Connect up keyboard/mouse/monitor, then plug in power.
  • MicroSD flash card installed into the Pi

  • For me a "rainbow screen" popped up, then an image of 4 raspberries. Then it cycled around again and finally got to a login prompt. It took a long time, so I'm not sure whether something went wrong and it rebooted itself, or if that was normal.
  • Default login for Snappy is ubuntu/ubuntu.

Installing Raspbian via NOOBS on the Pi

NOOBS is a helper you can put on the flash drive to more easily install other distros. To setup the flash drive for NOOBS, reformat it as FAT32. I used gparted to do this. The drive had a bunch of existing partitions already on there from the Snappy install. Delete them all and create one single FAT32 partition, then Apply. Once complete, it should look something like this:

gparted after reformatting flash drive as FAT32

Unzip the NOOBS zip file, and copy the content onto the SD card. Once done, the file system should look something like this:

NOOBS unzipped onto flash drive

Put the SD Card back in the Pi. When it boots it will come up with an installation screen. Select Raspbian and optionally the Data Partition if you want it. It will then blat the drive with the Raspbian install, which will take a while.

Once complete, it should reboot and bring up another menu. I selected [1 Expand Filesystem] to make the rest of the SD card storage available, but it told me NOOBS had already done this. Then I selected Finish and it went to the console, selecting 3 (or 4?) to boot to desktop might have been a better option in general because that menu no longer appears on subsequent reboots.

Logging in to the console (username: pi, password: raspberry) you can start the desktop by running startx anyway.

Interestingly, I plugged in my Netgear WNA3100M (cheapy USB wireless adapter), and it connected right away. With the BeagleBone in comparison I got stymied trying to find firmware for that device. Score +1 for Raspbian right there.

Initial play with the Pi 2 shows the desktop to be pretty snappy, feels quite usable. There are few glitches in the rendering and occasionally you see artifacts if you, say, scroll the browser too fast for it to keep up, but overall the "feel" wasn't too bad. Will have to give it a bit more of a go to see what it can do.

Raspberry Pi 2B desktop screenshot (click to enlarge)

Sunday, January 18, 2015

Gigabyte Z97X-UD5H Stock Voltage Issue

As mentioned in the build log post back a bit, when combined with an i7 4790K the Gigabyte Z97X-UD5H has an issue at stock settings where (it appears) to auto-overclock to CPU, bumps the voltage way too high, and causes an immediate power shutdown.

Manually overclocking the board should fix this problem, but I found (with a bit of help) there are three other ways you can fix it by changing some settings in the BIOS:

  • Disable the Turbo Boost in the BIOS (as per this superuser answer). The setting can be found in M.I.T => Advanced Frequency Settings => Advanced CPU Core Settings => Intel Turbo Boost.
  • Turn off the "K OC" setting in Advanced CPU Core Settings.
  • Reset the CMOS (using the "clear CMOS" button on the board is okay), then start the machine and choose "Load Optimised Defaults" from the menu that pops up.

This thread at Intel's forum has information from many 4790K users on problems and test results they've found: https://communities.intel.com/thread/54032.

Saturday, January 10, 2015

Yet Another Canon Printer Linux Driver Install

After going round the loop with my Canon MF-4140 time or two before, I had to print something today and found I needed a slightly different process this time on Kubuntu 14.04.

There now appears to be a 64-bit driver for the MF-4100 series on Linux, which I downloaded from here.

After installing the two .deb files (cups-common and the cndrvcups-ufr2), the printer driver was available in the Add Printer dialog. It still didn't work though, despite appearing to install, accept and complete jobs. The trick was revealed by the answer in this askubuntu question, to search for missing dependencies for the .so libraries in the driver source tree. I installed lib32stdc++6, but as Dan Menes also discovered, it was the 32-bit version of libxml2 (sudo apt-get install libxml2:i386) that finally gets the thing to work.